Table of Contents
- Step 1: Make Sure It’s Safe to Stay in the House
- Step 2: Stop the Water Source and Cut the Power
- Step 3: Work Through This Water Damage Checklist
- Step 4: How to Dry Out a House After Water Damage
- Step 5: File Your Water Damage Insurance Claim
- Step 6: Stop Mold After Water Damage
- Step 7: Know When to Call a Restoration Professional
- Frequently Asked Questions
Last Updated: October 13, 2026
Step 1: Make Sure It’s Safe to Stay in the House
Water damage in your home rarely announces itself politely. According to the Insurance Information Institute’s guide to homeowners insurance, water damage and freezing account for a large share of homeowner claims every year, and the first hour after discovery shapes how much you can save.
Before you grab a mop, stop and check three things:
- Is the water still rising or flowing? If yes, leave and call for help.
- Is there any chance the water touched wiring or outlets? If yes, do not enter that room.
- Does the water look or smell contaminated? Gray or black water, or water from a toilet or sewer line, means do not touch it.
This guide from Sentinel Restoration walks you through the full recovery process, from the first safe steps to filing your claim. Below, we cover the seven steps that matter most, plus a checklist you can follow room by room.
Never wade into standing water in a finished basement or near electrical panels. Water and live current are a fatal combination, and you cannot tell by looking whether a circuit is still energized.
Step 2: Stop the Water Source and Cut the Power
Stop the water first, then kill the power to wet areas. These two actions limit how much damage you’re dealing with.
To stop the water:
- Find your main shutoff valve. It’s usually near the water meter or where the supply line enters the house.
- Turn it clockwise until it stops.
- If the leak is from a burst pipe you can isolate, close the nearest valve instead.
To cut power safely:
- Stand on a dry surface.
- Use a dry wooden stick or a rubber-handled tool to flip breakers.
- Never touch a breaker box if you’re standing in water.
If you can’t reach the panel safely, call an electrician or your utility company. A plumber can handle the source; an electrician handles the panel.
Step 3: Work Through This Water Damage Checklist
A water damage checklist keeps you organized when everything feels chaotic. Work top to bottom and don’t skip the documentation step.
First, Identify the Water Category Before You Touch Anything
Not all water is the same, and the category changes your precautions, your salvage decisions, and sometimes your insurance coverage. Restoration professionals generally group water into three categories:
- Category 1 (clean water): Broken supply lines, rain intrusion, or a leaking faucet. Low contamination risk at the source, but it can degrade to Category 2 within about 24 to 48 hours if it sits in contact with building materials.
- Category 2 (gray water): Washing machine discharge, dishwasher overflow, toilet bowl water without solid waste, or water that has passed through a structure. It may contain detergents, chemicals, or microbes. Do not drink it, and wear gloves and eye protection.
- Category 3 (black water): Sewage backups, toilet trap water with solid waste, ground-surface flooding, and rising river or storm water. It is grossly contaminated and carries bacteria, viruses, and parasites. Do not enter without proper PPE, and treat all porous materials as unsalvageable.
If you cannot tell the category, assume the worst and keep skin contact to a minimum. A common pattern is for homeowners to treat a Category 3 backup like a clean-water spill, then pay for it with illness or a denied claim.
Stop-Work Criteria: When to Back Out and Call for Help
Before you start removing water, check for these conditions. If any apply, stop and call a licensed professional or your utility:
- Electrical hazards: Standing water at or above the level of outlets, a submerged panel, or a burning smell. Do not enter the room.
- Structural instability: Sagging ceilings, cracked or bowed walls, a spongy floor, or a door that suddenly won’t close. These can signal compromised framing or a failing foundation.
- Sewage or chemical contamination: Category 3 water, visible waste, or an unknown chemical sheen on the surface.
Document Everything Before You Move Anything
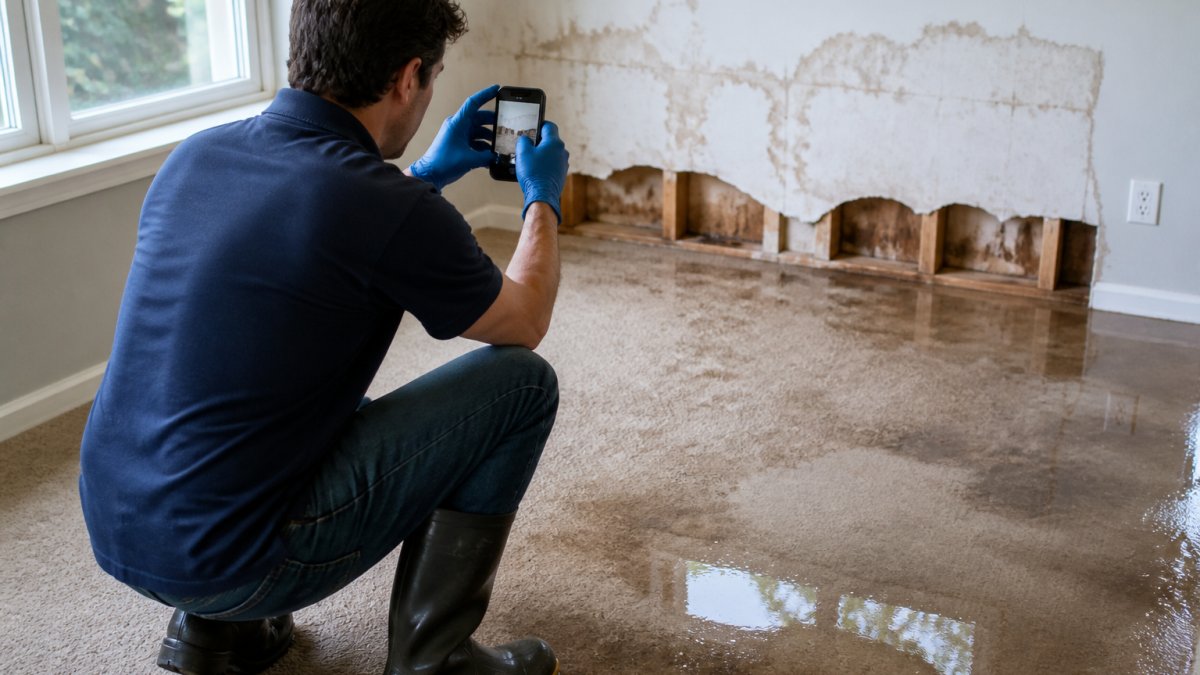
Take photos and videos of every affected room before you touch a thing. Your insurance company will ask for proof, and adjusters want to see the damage in its original state.
- Shoot wide shots of each room.
- Get close-ups of waterlines on walls.
- Photograph damaged furniture, electronics, and personal belongings.
Keep a written list too. Note the date, time, and where the water came from. If you have receipts or purchase records for high-value items, gather them now. Insurers often apply depreciation to personal property claims, and proof of age and condition supports a better settlement.
Remove Standing Water and Salvage What You Can
Get the water out fast. A wet vacuum, buckets, and towels work for small amounts. For deeper water, you’ll need a pump or a professional with water extraction equipment. If the water is Category 2 or 3, wear rubber boots, gloves, and eye protection, and ventilate the area.
Material-by-material salvage guidance:
- Drywall: Remove and discard any drywall that was soaked through, sagging, or in contact with Category 3 water. Drywall that only got a light splash on a painted surface may be dried in place if you can verify moisture readings return to normal.
- Insulation: Batts and blown-in insulation that got wet generally must be removed. It loses its R-value and holds moisture against framing.
- Carpet and padding: Carpet padding should always be discarded after a soak. Carpet itself may sometimes be dried and cleaned after Category 1 water, but replace it after Category 2 or 3.
Move salvageable items to a dry area and prop them up so air can reach all sides. Do not stack wet items against each other.
If the water came from a sewage backup or outdoor flooding, do not attempt to salvage porous materials yourself. Category 3 water requires professional disinfection, and improper cleanup can leave pathogens behind.
Step 4: How to Dry Out a House After Water Damage
Drying a house after water damage means moving air, pulling moisture, and giving it time. This is where most homeowners rush and pay for it later.
Open windows and doors when weather allows. Set up fans to push air across wet surfaces. Run dehumidifiers to pull moisture out of the air so it doesn’t settle back into walls and floors.
- Point fans at walls, not just the floor.
- Empty dehumidifier tanks often, or run a hose to a drain.
- Keep interior doors open so air moves between rooms.
Verify Drying With Moisture Readings, Not Touch
Drywall that feels dry to the touch can still be wet inside. A moisture meter tells you what your hand can’t.
A FEMA guide to drying your home after a flood recommends checking hidden spaces like wall cavities, under flooring, and behind baseboards. If readings stay high after several days, the structure isn’t dry yet.
Buy or borrow a pin-type moisture meter. Take readings at the base of walls, around window frames, and near the floor. Write down the numbers each day so you can see the trend, not just today’s reading.
Step 5: File Your Water Damage Insurance Claim
File your water damage insurance claim as soon as you’ve documented the damage. Waiting gives the insurer room to question the timeline, and many policies require prompt notice of a loss.
Build Your Evidence File Before You Call
Adjusters work from documentation. The stronger your file, the smoother the claim. Gather these items before you contact your insurer:
- Photos and video: Wide shots of each affected room, close-ups of waterlines, and video walkthroughs with narration.
- A written inventory: Item, approximate age, condition before the loss, and replacement cost if known.
- Receipts and records: Purchase receipts, credit card statements, or warranty cards for high-value items.
Understand What Your Policy Usually Covers, and What It Doesn’t
Most homeowners policies cover sudden and accidental discharge, such as a burst pipe or a failed water heater. They typically exclude gradual leaks, poor maintenance, and flood damage from rising water. Flood coverage is usually a separate policy through the National Flood Insurance Program or a private flood insurer.
Ask your adjuster these questions in writing if possible:
- Is this loss covered under my policy?
- What is my deductible, and does it apply per occurrence?
- Do I need to get estimates before repairs, or will you send an adjuster first?
Know the Claim Timeline and Deadlines
Claim timelines vary by state and policy, but a common pattern is:
- Report the loss promptly. Many policies require notice within a reasonable time, often interpreted as days, not weeks.
- Adjuster inspection. This may happen within days to a couple of weeks after you report.
- Proof of loss. Some policies require a sworn proof of loss within a set window, often 60 days from the date of loss. Missing this can jeopardize your claim.
- Payment and repair. Once the scope is agreed, the insurer issues payment, sometimes in stages as work progresses.
Check your policy language and your state’s insurance department guidance for the specific deadlines that apply to you.
Preserve Damaged Items Until the Adjuster Says Otherwise
Do not throw away damaged items until your adjuster says you can. Insurers sometimes want to inspect them, and tossing them early can weaken your claim. If you must dispose of something for health or safety reasons, photograph it first, note the date and reason, and keep a sample if practical.
Do not sign a release or accept a final payment until you are confident the scope of damage is fully documented. Hidden moisture in walls and floors can surface weeks later, and reopening a closed claim is difficult.
Keep a dedicated folder, physical or digital, for every claim document. Label each photo with the room and date. A well-organized file often speeds up the adjuster’s review and reduces back-and-forth.
Step 6: Stop Mold After Water Damage
Mold after water damage can start growing within a day or two on wet surfaces. The fix is simple: dry fast, dry completely, and remove what can’t be saved.
- Toss soaked carpet padding, insulation, and drywall that stayed wet.
- Clean hard surfaces with a mix of water and mild detergent.
- Dry the area again after cleaning.
If you see or smell mold, don’t paint over it or cover it with new drywall. That traps the problem and it comes back.
Step 7: Know When to Call a Restoration Professional
Call a restoration professional when the water is contaminated, the damage covers more than one room, or you can’t get moisture readings down after a few days.
Signs you need help:
- Sewage or gray water is involved
- Water reached wall cavities or under flooring
- You smell a musty odor that won’t go away
At Sentinel Restoration, our IICRC-certified team uses advanced moisture detection to find water you can’t see. We handle water damage, mold remediation, and reconstruction under one roof, so you’re not juggling contractors. If you’re also dealing with a claim, we can help you document the loss clearly.
Frequently Asked Questions
What should I do immediately after water damage in my home?
Shut off the water at the main supply valve if a pipe or appliance is the source, then cut power to any flooded room at the breaker panel before you step in. Photograph the damage before you move anything. If the water is contaminated or covers outlets, leave the house and call a restoration professional. The first hour matters most: standing water spreads into drywall, insulation, and flooring quickly, and the longer it sits, the more material has to be replaced rather than dried.
How fast does mold start growing after water damage?
Mold can begin colonizing wet materials within 24 to 48 hours, which is why drying is urgent rather than optional. Porous items like carpet padding, drywall paper, and insulation are the first to support growth. If you can get the structure dry within that window, you usually prevent a mold problem. If water sat for several days, or the source was contaminated water, assume mold after water damage is likely and have the area inspected and tested before you rebuild.
Can I stay in my house while it’s being dried out?
Sometimes, but not always. If the water came from a clean source like a supply line, the affected area is small, and the power is safe, many homeowners stay while fans and dehumidifiers run. You should leave if the water was contaminated (sewage, groundwater, or appliance discharge), if there is any electrical hazard, or if the moisture has reached wall cavities and ceilings. Restoration crews will tell you honestly whether the house is safe to occupy during drying.
What should I document before water damage cleanup begins?
Photograph and video every affected room from multiple angles before anything is moved or discarded. Capture standing water depth, water lines on walls, damaged personal belongings, and the source of the leak. Keep a written inventory of damaged items with approximate age and value, and save receipts for any emergency purchases like fans or hotel stays. This documentation is the backbone of your water damage insurance claim, and adjusters weigh it heavily when reviewing your estimate.
Water damage gets worse with every hour you wait, and the difference between a quick fix and a full rebuild often comes down to how fast you act and how well you document. Sentinel Restoration brings IICRC-certified expertise, advanced moisture detection, and a full range of restoration services to every job, from water extraction to mold remediation and final repairs. When you’re ready to restore your home and your peace of mind, contact us to get started.