


Last Updated: November 2, 2026
Quick Summary
Managing property damage restoration means following a clear sequence: make the scene safe, stop the source, document everything, then bring in certified professionals. Handle emergency mitigation in the first 24 hours, photograph all damage before cleanup, and track your insurance claim stage by stage.
- Shut off water at the main valve and gas at the meter if you smell fuel.
- Photograph every affected room before cleanup and keep a written inventory.
- Extraction and drying should happen within 24 to 48 hours for water damage.
- Do not attempt DIY cleanup of Category 3 water such as sewage backups.
- Ask for IICRC certification and a written, itemized estimate before work begins.
Table of Contents
- The Property Damage Restoration Process, Step by Step
- How to Document Property Damage for Insurance
- Damage-Specific Protocols for Water, Fire, Mold, and Storms
- A Realistic Property Restoration Timeline
- Managing Insurance Claims Without Getting Lowballed
- Vetting a Restoration Contractor and Understanding Costs
- Tenant Communication During Repairs for Property Managers
- Contact Sentinel Restoration for a Damage Assessment
- Frequently Asked Questions
The Property Damage Restoration Process, Step by Step
Managing property damage restoration starts with a clear sequence: make the scene safe, stop the source, document everything, then bring in certified professionals. This guide from This guide walks through each stage so you know what to do in the first hour, the first week, and the months that follow.
The First 24 Hours: Safety, Shutoffs, and Evacuation
The first day decides how much of your home survives. Shut off water at the main valve and gas at the meter if you smell fuel. Cut power to flooded areas at the breaker only if you can reach it while standing on dry ground. For a full walkthrough of what to do minute by minute, see our guide on what to do after water damage in your home.
Preventing Further Damage Before Help Arrives
Stop the spread before it compounds. Move furniture and rugs off wet flooring, prop up soaked cushions, and run fans and a dehumidifier if power is safe. Never walk on sagging ceilings, and never tape over a bulge. Open interior doors to improve airflow. Our tactics for stopping water damage from spreading cover the moves that buy professionals time.
How to Document Property Damage for Insurance
Documenting property damage for insurance means photographing every affected room before cleanup, keeping a written inventory of damaged items, and saving all receipts. Insurers deny claims that lack evidence, not claims that lack drama.
Before you spend hours on documentation, confirm what your policy actually covers. Our guide on whether insurance pays for water restoration answers the coverage questions adjusters ask first.
Damage-Specific Protocols for Water, Fire, Mold, and Storms
No two disasters require the same response, and the wrong first move can turn a recoverable loss into a total one. The table below summarizes the priority actions and stop-work triggers by damage type; the sections that follow explain the mechanisms so you can act with judgment rather than guesswork.
| Damage Type | First Priority | Stop-Work Triggers (Evacuate or Call a Pro) | Typical Mitigation Window |
|---|---|---|---|
| Water | Stop the source, extract standing water | Water near outlets or a wet electrical panel; sewage backup; sagging ceiling | Extraction and drying within 24-48 hours |
| Fire | Board-up and secure the structure | Any smell of gas; compromised roof or load-bearing wall; visible asbestos or lead debris in older homes | Soot and corrosion control within days |
| Mold | Fix the moisture source, then contain | Mold covering more than roughly 10 square feet; mold in HVAC; anyone with respiratory conditions in the home | Source correction before any surface treatment |
| Storm | Structural assessment and board-up | Downed power lines; cracked foundation; missing roof sections | Temporary weatherproofing within hours |
Water Damage: Extract, Dry, and Verify
Water damage is a race against absorption. Standing water wicks into drywall, subfloor, and framing within hours, and mold can begin colonizing wet porous materials in as little as 24 to 48 hours under warm, humid conditions. The sequence that works is: shut off the source, extract standing water, remove saturated carpet and pad that cannot be dried in place, then set up air movers and dehumidifiers to bring structural moisture back to a normal reading. For a deeper homeowner-focused walkthrough of emergency response, read our emergency water damage restoration guide.
Category 3 water, sewage backups, floodwater from outside, and any water that has sat long enough to support bacterial growth, is contaminated. Do not attempt DIY cleanup of Category 3 water, especially if anyone in the home is pregnant, elderly, or immunocompromised. Porous materials contacted by Category 3 water are generally removed rather than dried.
Fire and Smoke Damage: Corrosion Is the Hidden Threat
Fire damage is not only what burned. Acidic soot residue settles on metal fixtures, electronics, and finished surfaces and begins corroding them within days, so soot removal and air scrubbing matter even in rooms the fire never reached. The first priorities are board-up and roof tarping to prevent secondary water damage, shutting off utilities if the fire department has not already done so, and keeping people out of rooms with compromised structure.
Mold: Fix the Source Before You Treat the Surface
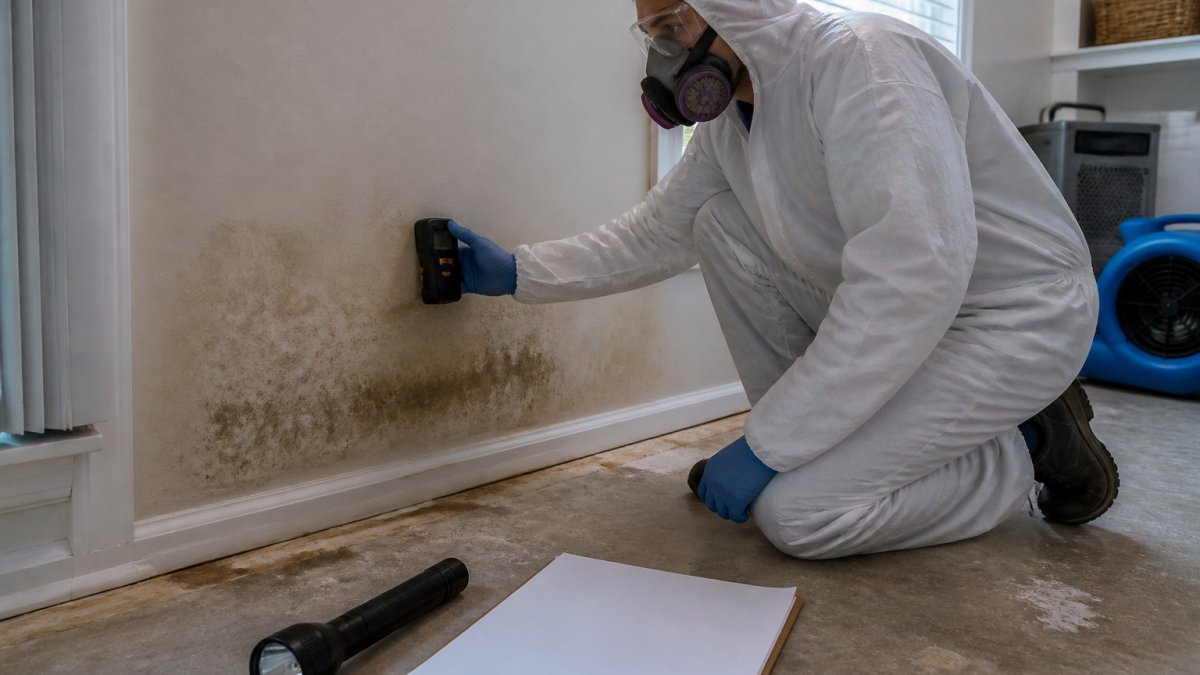
Mold is a moisture problem wearing a disguise. Treating visible mold without correcting the water source guarantees it returns. The protocol is to find and fix the moisture intrusion, dry the affected area, then contain and remove moldy porous materials. Mold remediation guidance from government and industry sources generally advises discarding porous materials with mold growth, and having larger affected areas handled by a qualified professional.
Storm and Wind Damage: Secure First, Assess Second
Storm damage often hides structural problems behind cosmetic ones. The first priority is safety: stay clear of downed power lines, do not enter a home with a visibly cracked foundation or displaced walls, and treat any smell of gas as an evacuation trigger. Once the property is safe to approach, board up broken windows and tarp damaged roof sections to prevent rain intrusion, secondary water damage after a storm is one of the most common and most preventable losses.
The common thread across all four damage types: stop the source, remove the hazard, document before you clean, and let moisture or structural readings, not appearances, tell you when the job is done.
A Realistic Property Restoration Timeline
A realistic property restoration timeline runs from emergency mitigation in the first 24 hours to final reconstruction over several weeks or months, depending on damage severity. Mitigation starts immediately. Drying and demolition typically follow within days. Reconstruction follows once the structure is dry and the scope is settled. Expect the insurance review to add time. Ask your contractor for a written schedule with milestones, and track it against the adjuster’s approvals.
| Phase | Typical Timing | What Happens |
|---|---|---|
| Emergency mitigation | First 24 hours | Water extraction, board-up, safety checks |
| Drying and demolition | Days 1-5 | Dehumidification, removal of unsalvageable materials |
| Scope and estimate | Week 1-2 | Contractor estimate, adjuster review |
| Reconstruction | Weeks 2-12+ | Rebuild, finishes, final inspection |
Managing Insurance Claims Without Getting Lowballed
A lowball estimate is not the final word, but beating one requires understanding how the claim actually moves through the insurer’s process. Most homeowner policies follow a similar arc: you report the loss, the insurer assigns an adjuster, the adjuster inspects and writes a scope, you receive an initial payment (often net of deductible and depreciation), repairs proceed, and you submit for recoverable depreciation and any supplemental items.
The Claim Workflow, Stage by Stage
- Report the loss promptly. Most policies require prompt notice, and delays can give an insurer grounds to question the claim. Report the date, cause, and visible damage, and ask for the claim number and the assigned adjuster’s contact information.
- Prepare for the adjuster inspection. Have your photo and video documentation, a written inventory of damaged items, receipts for any emergency mitigation you paid for, and your contractor’s written scope ready. Walk the adjuster through the damage in the same order you documented it.
- Review the adjuster’s scope line by line. Compare quantities, materials, and labor against your contractor’s estimate. Missing line items, demolition, haul-away, contents manipulation, or code-required upgrades, are common and correctable.
- Understand your deductible and depreciation. You pay the deductible out of pocket. The initial payment is typically the replacement cost minus depreciation and deductible; recoverable depreciation is released after you show the work was completed.
- Submit supplements and follow up in writing. When hidden damage is found during demolition, document it and submit a supplement. Log every call with date, time, and who you spoke with, and confirm verbal agreements by email.
Coverage Questions to Settle Before You Spend
Not every loss is covered, and the difference usually comes down to cause and policy language. Water damage from a sudden burst pipe is commonly covered; gradual seepage, repeated leaks, and maintenance neglect often are not. Flood, rising water from outside, is generally excluded from a standard homeowner policy and requires separate flood coverage. Mold coverage is frequently capped or limited to mold that results from a covered water loss.
Ask the adjuster for the line-item estimate in writing, not just a lump-sum number. A line-item scope is what lets you and your contractor identify missing or undercounted work and submit a targeted supplement instead of a vague dispute.
Documentation That Survives Scrutiny
Insurers deny claims that lack evidence, not claims that lack drama. Keep a claim file that includes: wide and close-up photos of every affected room taken before cleanup, a narrated video walkthrough, a written inventory with item descriptions, ages, and replacement costs where known, receipts for emergency mitigation and any temporary repairs, the adjuster’s written scope and all correspondence, and your contractor’s itemized estimate.
When the Numbers Don’t Match
If the adjuster’s scope falls short of your contractor’s, request a re-inspection and submit the specific missing items with photos and code references. Escalate in writing to the adjuster’s supervisor if needed, and keep the tone factual. Patience wins claims; documentation wins more.
Vetting a Restoration Contractor and Understanding Costs
Vetting a restoration contractor comes down to checking certification, licensing, written scope, and references. Ask for IICRC certification and verify it through the IICRC directory. Request a written, itemized estimate before work begins, and never sign a blank authorization. Costs depend on damage type, square footage, and materials, so get written estimates and compare scope line by line rather than totals. For realistic cost figures to compare contractor quotes, see our water damage restoration cost after a leak guide.
Tenant Communication During Repairs for Property Managers
Tenant communication during repairs keeps a restoration project from becoming a dispute. Notify tenants in writing before crews arrive, give a realistic schedule, and name a single point of contact. Post daily or weekly updates, even when nothing has changed. Document every notice and every tenant response. Clear communication reduces complaints, protects the landlord’s legal position, and keeps the project moving.
Contact Sentinel Restoration for a Damage Assessment
A disaster leaves you with two jobs: protect your family and protect your claim. Doing both well takes a certified team that shows up, documents thoroughly, and explains every step. Sentinel Restoration’s IICRC-certified team handles water damage, fire restoration, mold remediation, and storm recovery, using moisture detection technologies to help confirm a property is dry before reconstruction begins. We aim to restore properties to pre-loss condition.
Frequently Asked Questions
What should I do first after discovering property damage?
Make sure everyone is safe and get out if there is any sign of a gas leak, sagging ceilings, or standing water near outlets. Once safe, shut off the water or power at the source, then start photographing everything before you move or throw anything away. Call your insurance company to open a claim and keep a written log of every call, date, and person you speak with. Documenting early protects your claim and speeds up the restoration process.
How long does property damage restoration usually take?
The property restoration timeline depends on the damage type and how far it spread. Timing depends on the damage type and how far it spread. Ask your contractor for a written schedule with milestones so you can plan around it.
Can I clean up water or mold damage myself?
Small clean-water spills on hard surfaces can often be dried with towels and fans within a day. Anything involving contaminated water, mold growth, or water that has soaked into drywall, insulation, or carpet should go to a professional.
How do I document property damage for an insurance claim?
Take wide photos of each affected room first, then close-ups of individual items, and photograph serial numbers and receipts where you have them. Write detailed notes on what was damaged, when you found it, and what you did to stop further damage. Keep damaged items until the adjuster has seen them, and save every receipt for temporary repairs, hotel stays, and equipment rentals. A room-by-room inventory with photos is the strongest evidence you can hand your adjuster.
What does IICRC certification mean for a restoration company?
The IICRC sets the standards most insurers and courts recognize for water, fire, and mold remediation work. IICRC certification indicates training in recognized restoration standards. You can verify a company’s certification through the IICRC directory.
Who is responsible for repairs, the landlord or the tenant?
In most leases the landlord handles structural repairs and systems like plumbing, roofing, and HVAC, while tenants cover damage they caused and their own belongings. Check your lease and local rules, which may set habitability standards. For property managers, the practical step is to document the cause, notify the tenant in writing, and coordinate restoration work with clear entry notices and a shared schedule.

